How to Repair Your Own Roof Leak Until You Can Afford a Professional Fix
Some roof leaks can be temporarily fixed with a few steps and a willing mind. As we all have experienced, sometimes we just don’t have the means this month to pay to get it fixed professionally. Here are some tips on how to DIY until you make the call.
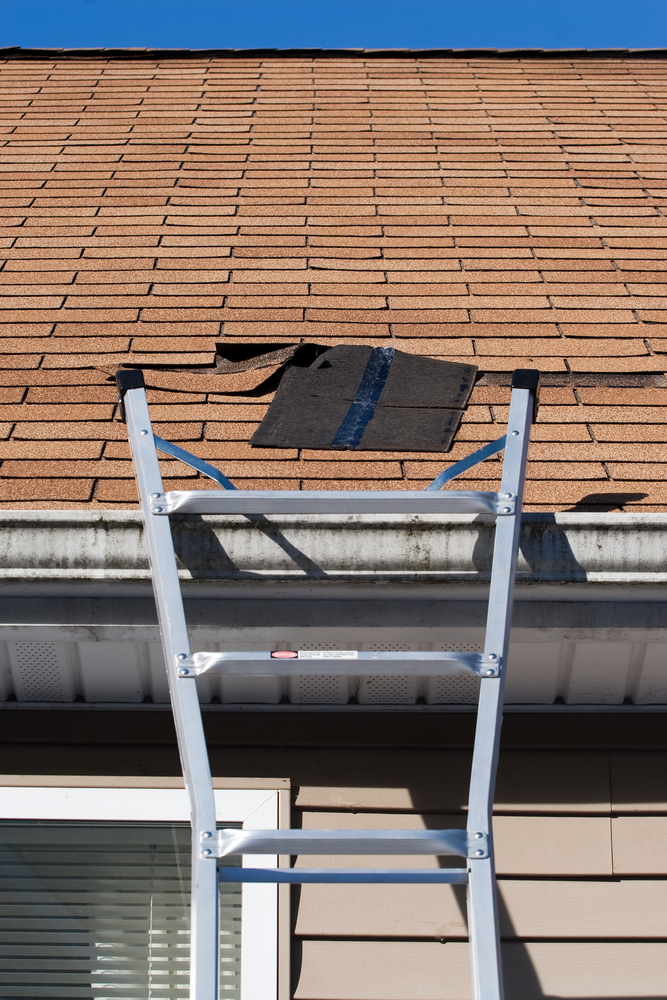
A Damaged Roof Shake
- When you encounter the damaged roof shake, break it with a hammer and use a chisel to get into the shake
- Insert the chisel further to take out the pieces
- Start cutting off the ends of the nails exposed that cannot be pried out. Try not to damage other shakes in the process
- Get a new shake and start shaping it to cover the exposed area by cutting it about 3/8 inches smaller than the damaged one
- Now slide to fit the new shake onto the exposed area using two galvanized roofing nails to place it. If the old nails are in the way, use a coping saw to make holes into the shake so the shake can be inserted.
- Use a nail set to set the nail heads and seal it with caulking compound.
Repairing Shingles
Finding the Leak
Flat roof: the damaged material will be directly above the leak
Slanted roof: Look for areas away from the leak that is higher.
Attic: Look for water stains, mold or black marks
Roof: Look for shingles that are damaged, curled edges or exposed areas and exposed roofing tacks.
Hose down your roof and have a helper stay inside to wait for the leak to surface.
- Start flattening out the damaged shingles that are curled. Unfortunately if you have to do this during cold weather, use a hairdryer to heat the shingle so it can be malleable.
- Start pasting back curled shingles with asphalt roof cement or compound closing the exposed areas.
Replacing a Damaged Shingle
A shingle needs to be replaced when the shingle can easily be lifted, broken or crumble.
- Pry out the old shingle
- Make sure you clear all the remains of the old shingle from the exposed area
- Round the back corners of the new shingle
- Insert the new shingle and use a galvanized roofing nail of 1 ¼ inch and nail it on the upper portion of the shingle. After cover the nail with roof cement
Fixing Connections
- Remove all damaged caulking so the new caulking will stick to the main surface
- Clean and dry the exposed area
- Apply new caulking to exposed area and let it dry
Roll Roofing
- Look for cracks or bubbles on the roof
- Pop the air bubble by cutting it in the middle and make sure you take all the moisture out waiting for the surface to be completely dry.
- Put a thick layer of roofing cement to the damaged surface and apply pressure
- Use galvanized roofing nails on all sides
- Put another layer of roofing cement on the surface covering the nail heads.
Make sure during the process of repairing you are safety conscience at all times. These are effective methods to buy you more time until you have to call your professional roofer contractor in washington dc to get it officially repaired.